by Alyssa Ramos
Want to carve the perfect pumpkin but worried it’ll turn up on the list of biggest Pinterest fails? Don’t worry, unless you are completely artistically inept, you should be able to follow this and carve a pumpkin like a pro. Yes, I think I’m a professional pumpkin carver.
First of all, DO NOT USE KNIVES. That is all. Spend the freaking $4.99 on the tacky little pumpkin carving kit at CVS. In fact, get two, because they will break but those are the only tools that really work. Oh, and also because I’ve seen numerous people stab themselves in the leg on accident because they decided to use a kitchen knife instead of a 4-inch long little carving tool with an idiot-proof plastic handle.
Try to find a package that has a marking pen, a saw tool for the top, a smaller detailer saw for carving, a stencil poker, and a goop scoop. Then get your pumpkin, newspaper or a plastic table cloth, real or fake tea light candles, and any other necessary supplies…like wine, and get ready to carve.
To scoop out the gross guts, cut a hole around the top, but wiggle the carving tool so that it loosens it, otherwise you’ll end up trying to yank it off and will rip off the stem. Once the top (or the “hat” as I like to call it) is off, chop the gross spaghetti part off and set it aside. Scoop out as much of the mushy pumpkin poop and seeds inside of the pumpkin as you can, and set the seeds aside if you want to get real crafty and make roasted pumpkin seeds.
To do that you just put them in a shallow 8×11″ baking dish, sprinkle with olive oil or spray butter, add your choice of seasonings like salt, or cinammon and sugar, then bake at 350 degrees for 30-45 minutes. I made that up so make sure to check on them intermittently.
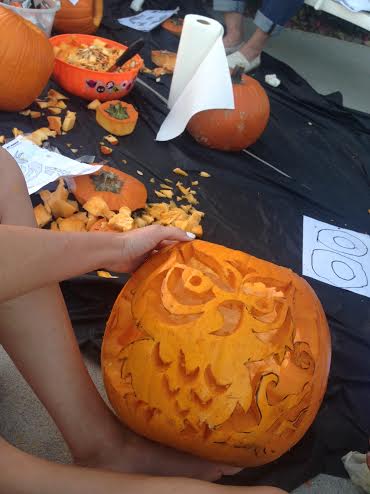
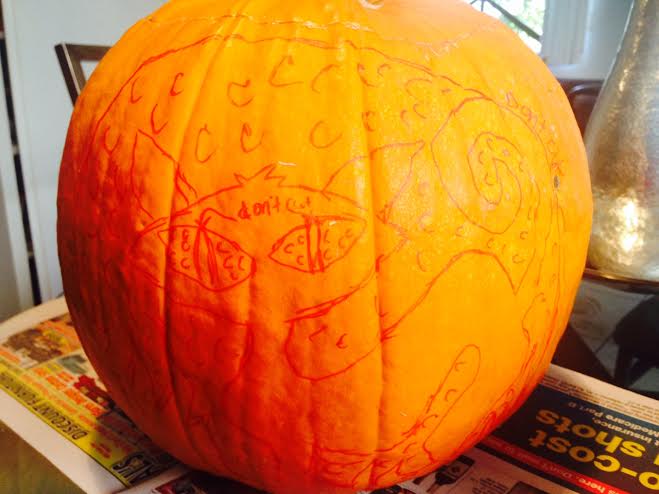
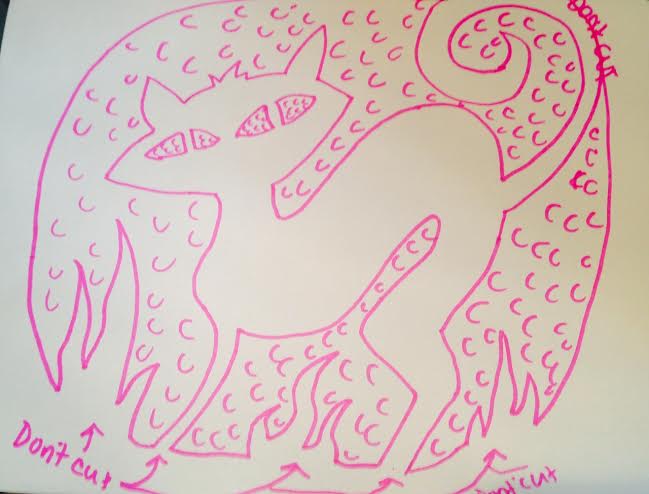
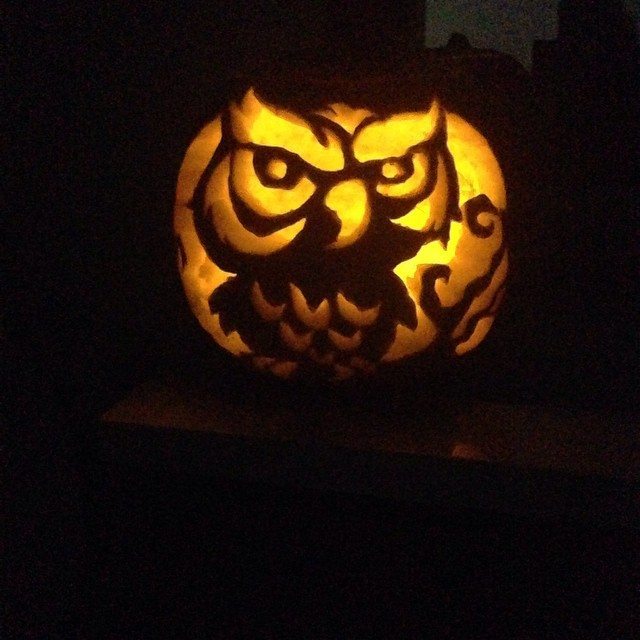
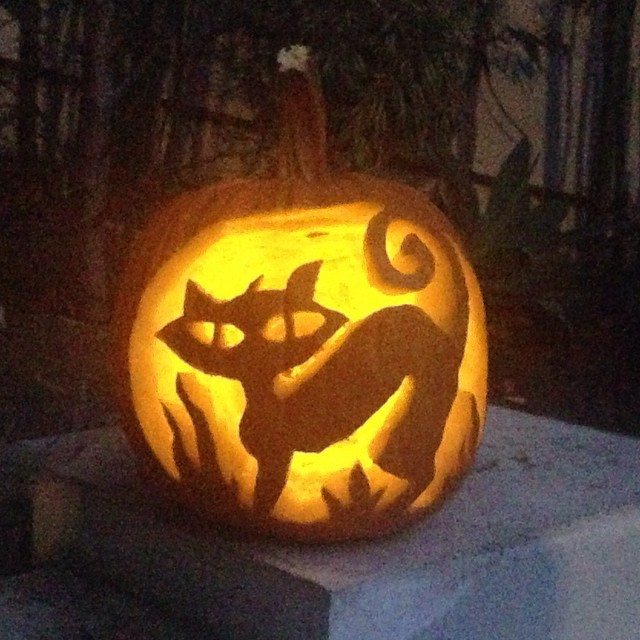
The trick here is to know where to cut and where not to cut. I’m able to look at a picture of a carved pumpkin and copy it freehand onto my pumpkin, but if that doesn’t sound do-able, definitely use a stencil. You can buy stencils, or print them out from your computer, like the one I made for the cat design.
If you’re doing freehand, either use the washable marker that comes with the kits or a pink or orange permanent marker so you can’t see the markings when it’s done. If you’re using a stencil, tape it to your pumpkin, and use the poking tool to poke holes along the lines that you are supposed to cut along. MAKE SURE YOU DON’T CUT AREAS THAT ATTACH THE DESIGN TO THE PUMPKIN.
To ensure that you cut the correct areas, draw little “c”‘s in the areas that are supposed to be cut out, and even write “don’t cut” in areas that will ruin the whole thing if you cut them.
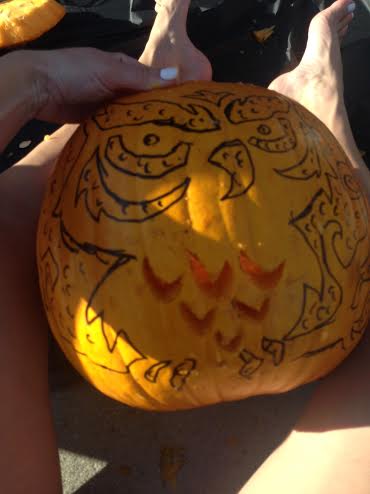
Use the small tool to carefully saw the areas that are supposed to be cut out. If there are small details, like eyes or designs, cut those out first while the pumpkin is still sturdy, then cut big areas out last. Don’t force the pieces out, if they don’t feel loose, go back around them with the saw, or cut big areas into smaller ones and take them out in pieces. You’ll probably cut at an angle which will make the inner pulp show, so reach the tool inside and cut it off so that you only see the outline of what you’ve cut out.
Once you have cut off all of the pieces that are supposed to be cut out, you can go back over the design edges very carefully with the small tool to smooth them out. There’s a good chance you’ll still break a piece off, so keep a few toothpicks handy to put it back on.
Secret: Super Glue works on pumpkins.
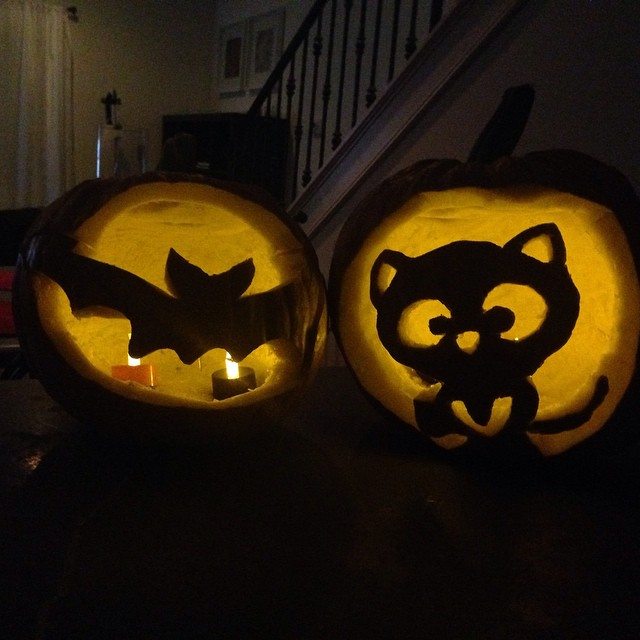
I’m sure you already know how to light a candle or turn on a battery-operated one (which I prefer), so do that and put the lid back on, then take a ton of pictures to post on Instagram!
Another Secret: Pumpkins rot quickly in warm weather so if you’re trying to preserve it until Halloween, keep it in a cool area, or even the refridgerator if you have room.
Alyssa Ramos writes on Yahoo about her ethical encounter with 15 orcas that approached her…
If you've ever dreamed of moving to Italy or perhaps falling in love while traveling…
If Fukushima isn’t on your radar, let me enlighten you to this hidden gem in…
Oh hey look, there's 0 tourists in my photos of the Great Wall of China,…
I traveled solo to China’s viral “cyberpunk city”, Chongqing (pronounced “ChongCHing”) to see if it…
Snorkeling with orcas in La Ventana, Mexico was one of the wildest animal encounters of…